Welcome to our detailed guide on effectively removing pressure marks from your laptop screen. If you’ve been bothered by unsightly blemishes or discolored spots on your display, chances are you’re dealing with pressure marks. These can be particularly distracting during crucial work sessions or when you’re immersed in your favorite movies. Thankfully, there are several methods to address these pressure marks, and we’re here to walk you through each step.
Understanding Pressure Marks
Pressure marks manifest as discolored or darkened areas on LCD screens, specifically affecting laptop displays. Unlike issues such as dead pixels or screen burns, pressure marks result from external physical force rather than inherent flaws in the display technology. In this guide, we’ll delve into the causes behind pressure marks and explore effective solutions to remedy them.
What Causes Pressure Marks on Laptop Screens?
Pressure marks on laptop screens stem from the application of uneven force to the display. Various scenarios can lead to the formation of these marks, including:
1. Excessive Pressure while Using the Laptop
Pressing too hard on the screen during typing or using the touchpad can contribute to pressure marks. Additionally, closing the laptop with objects between the screen and the keyboard may exert uneven force, leading to discoloration.
2. Lack of Padding in Laptop Bags
Carrying your laptop in a bag without sufficient padding exposes it to jostling and bumping, potentially resulting in the formation of pressure marks on the screen.
3. Placing Objects on the Closed Laptop
Avoid placing items such as books or papers on a closed laptop, as this can exert pressure on the screen and lead to the development of unsightly marks.
4. Uneven Pressure during Manufacturing
In some instances, pressure marks may originate from uneven pressure applied during the manufacturing process. While usually not a significant concern, it can be noticeable in certain cases.
By understanding these causes, you’ll be better equipped to prevent and address pressure marks on your laptop screen. In the following sections, we’ll guide you through effective methods to remove these marks and restore the clarity of your display.
How to Remove Pressure Marks on Your Laptop Screen
Fortunately, there are effective methods to eliminate pressure marks from your laptop screen. Let’s explore one of the techniques:
Method 1: The Gentle Rubbing Method
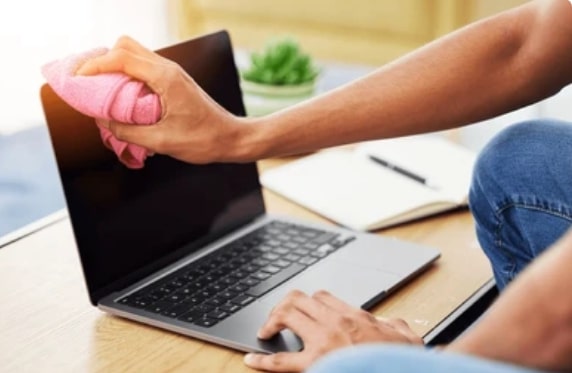
To begin, ensure your laptop is powered off and disconnected from any power source.
- Gently Rub the Affected Area: Using a soft, dry cloth, apply gentle circular motions to the area with the pressure mark.
- Consider a Slightly Damp Cloth: If the pressure mark persists, you can opt for a slightly damp cloth, but exercise caution to avoid excessive moisture.
- Avoid Harsh Chemicals: It’s crucial to refrain from using any harsh chemicals or solvents, as these substances can potentially harm your screen.
- Thoroughly Dry the Screen: Once the pressure mark is successfully removed, ensure the screen is completely dry by using a soft, dry cloth.
By following these steps, you can effectively address pressure marks on your laptop screen without causing any damage.
Method 2: The Warm Compress Approach

Now, let’s dive into another effective method to bid farewell to those pesky pressure marks on your laptop screen:
Warm Compress Method to Remove Pressure Marks from Laptop Screen:
- Prepare Your Laptop: Begin by turning off your laptop and disconnecting it from any power source.
- Craft Your Warm Compress: Take a clean, soft cloth and soak it in warm water. Wring it out until it’s damp but not excessively wet.
- Apply the Warm Compress: Gently place the warm compress over the troublesome area on your screen and let it work its magic for 5-10 minutes.
- Gentle Rubbing Time: After the allotted time, remove the warm compress and delicately rub the affected area with a dry cloth.
- Repeat if Necessary: If the pressure mark persists, don’t hesitate to repeat steps 3-4 until the issue is resolved to your satisfaction.
By following this warm compress method, you’re on your way to enjoying a pressure-mark-free laptop screen. Remember, patience is key, and repeating the process as needed ensures a thorough resolution.
Method 3: The Microfiber Cloth Technique
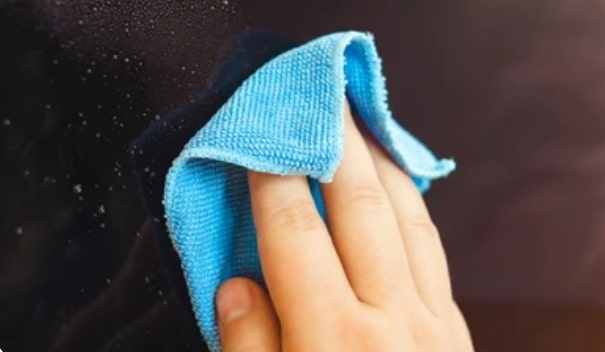
Let’s explore another practical approach to banishing those persistent pressure marks from your laptop screen:
Microfiber Cloth Method to Remove Pressure Marks from Laptop Screen:
- Power Down and Unplug: Kick off the process by powering down your laptop and disconnecting it from any power source.
- Utilize a Clean Microfiber Cloth: Grab a clean, dry microfiber cloth and employ gentle circular motions to rub the affected area.
- Consider a Slightly Damp Cloth: If the pressure mark persists, introduce a slightly damp microfiber cloth into the equation. Ensure it’s not overly wet.
- Beware of Harsh Chemicals: A crucial reminder – avoid harsh chemicals or solvents at all costs, as they can wreak havoc on your screen.
- Thoroughly Dry the Screen: Once the pressure mark surrenders, finalize the process by thoroughly drying the screen with a soft, dry cloth.
- Seek Professional Assistance if Needed: If, despite your best efforts, the pressure marks persist, it might be time to enlist the help of a professional for further repair.
By embracing the microfiber cloth method, you’re taking a step towards a spotless laptop screen. Remember, a careful and systematic approach ensures the best results.
Recommended Article: Cost To Repair A Laptop Fan, Methods, and Troubleshooting
Knowing When to Turn to the Pros for Laptop Screen Issues
Pressure marks on your laptop screen can be a real nuisance, affecting both your concentration and the display quality over time. While many minor issues can be addressed with DIY methods or specialized kits, there are situations where the expertise of a professional becomes crucial. Here’s a comprehensive guide to help you recognize when it’s time to seek professional assistance, including insights into the associated costs and the overall process.
- Severity Check:
If DIY attempts and specialized kits haven’t made a dent in the pressure marks, or if the situation has worsened, it’s a clear sign to consult a specialist.
- Functionality Impact:
When pressure marks start messing with your screen’s touch sensitivity or visibility, hindering your laptop use, DIY solutions might fall short, making professional assistance imperative.
- Persistent Problems
If pressure marks persistently reappear despite your efforts to remove them, it’s an indication of a potentially more significant issue that warrants professional diagnosis and repair.
- Warranties and Guarantees:
Before heading to the professionals, check if your laptop is still under warranty. If it is, review the warranty guidelines to see if screen repair or replacement is covered. Remember, attempting self-repair might void the warranty, so if you’re covered, going to the pros is often the wisest choice.
- Cost Considerations:
The cost of professional screen repair varies based on factors like the severity of the pressure marks, your laptop’s make and model, and warranty coverage. Prices can range from $100 to several hundred dollars, particularly for more severe cases requiring screen replacement.
- Process and Timetable:
Opting for professional help typically involves diagnosing the problem, providing a repair quote, and then executing the necessary Laptop Diagnosis and Repairs or replacements. While the timeframe can vary, anticipate being without your laptop for at least a few days.
By recognizing when it’s time to seek professional laptop repair company help, you empower yourself to make informed decisions on effectively dealing with pressure marks on your laptop screen.
FAQs on Removing Pressure Marks from Laptop Screens
Q1. How can I remove pressure marks from my laptop screen?
A. Pressure marks on a laptop screen can be bothersome, but there are several methods to address them:
- Gentle Rubbing Method: Use a soft, dry cloth to gently rub the affected area in a circular motion. If needed, a slightly damp cloth can also be effective.
- Warm Compress Technique: Apply gentle heat to the pressure mark by using a warm compress. Soak a clean cloth in warm water, wring it out to a damp state, and place it over the mark for 5-10 minutes.
- Microfiber Cloth Buffing: Opt for a microfiber cloth to gently buff the affected area. Microfiber is designed to be gentle on sensitive surfaces like laptop screens.
- Vinegar and Water Solution: If the pressure mark persists, mix 1 part distilled white vinegar with 3 parts water. Apply a small amount of the solution to a clean cloth and gently rub the affected area in a circular motion.
Q2. What should I avoid when cleaning my laptop screen?
A. To prevent damage to your laptop screen and worsen pressure marks, avoid the following:
- Harsh Chemicals or Solvents: Refrain from using Windex or other ammonia-based cleaners, rubbing alcohol, or any solvents.
- Abrasive Materials: Do not use paper towels or other abrasive cloths that can scratch the screen.
- Direct Liquid Application: Avoid spraying liquid directly onto the screen, as it can seep into sensitive components.
Q3. How can I prevent pressure marks from forming on my laptop screen?
A. Preventing pressure marks is proactive. Follow these tips:
- Handle with Care: Be gentle with your screen; avoid pressing too hard and refrain from closing it with objects between the screen and keyboard.
- Padded Laptop Bag: Use a padded laptop bag to shield your device from bumps and jostling during transportation.
- Clear Laptop Surface: Avoid placing objects on your closed laptop to prevent unnecessary pressure on the screen.
- Prompt Removal of Pressure Marks: If pressure marks appear, address them promptly. The longer they linger, the greater the risk of becoming permanent.